TAG
TAG- 3D , Photoshop CS5 Extended , 成形
2011年04月08日
3D機能自体はCS3 Extendedから搭載されていたが、CS5 Extendedではさらに表現の幅が広がっている。
 Photo:片岡竜一
独自の3D機能を理解しながら、作りたい立体を組み立てる
Photoshopの3D機能は CS4 Extendedでもプリセットで11種類のプリミティブな3Dオブジェクト(立方体、円柱、球、ピラミッドなど)が作成できる機能が搭載されていたが、任意の形状のオブジェクトを成形できるモデリング機能がなかった。
CS5 Extendedには新たに「成形」という機能が搭載され、テキストレイヤーや選択したパスなどから3Dオブジェクトをモデリングすることが可能になった。
今回はその「成形」機能を使ってPhotoshop内で複数の3Dオブジェクトをモデリングし、それらを組み合わせることで、エレキギターの3Dオブジェクトを作ることにした。レイヤーに3Dオブジェクトが作成できるため、その後のレタッチワークも容易に行なえる。
すでに他の3Dソフトを使ったことのある人は独自のインターフェイスに少々戸惑うかもしれないが、慣れてくると他のソフトにはない手軽さが楽しめる。
2D画像を「押し出し」で基本となる3Dオブジェクトをつくる。
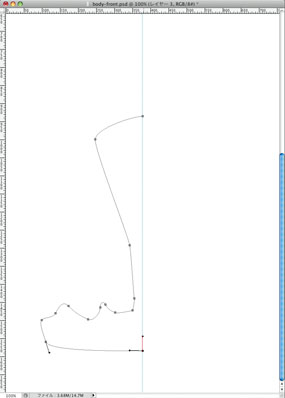
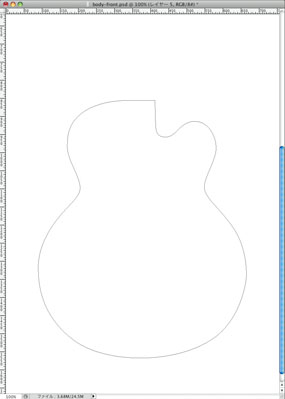 新規レイヤーを用意し、白などで塗りつぶしておく。そこにギターのボディラインをパスで描く。
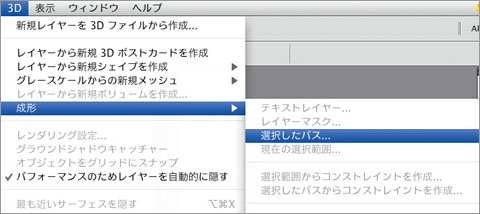
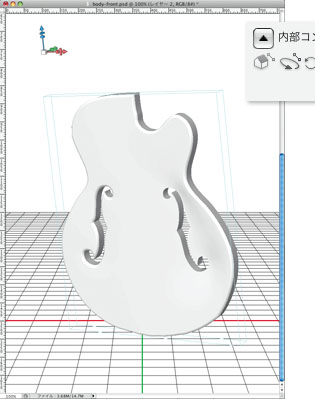
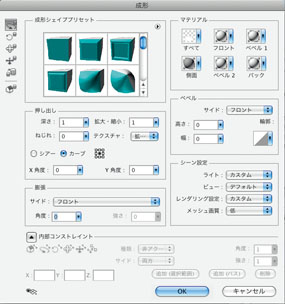 「3D」メニューから「成形」→「選択したパスを選ぶ」を適用すると、上のデフォルト画面が現れて、右画面のようにパスのアウトラインで押し出した3Dオブジェクト状が作られる。

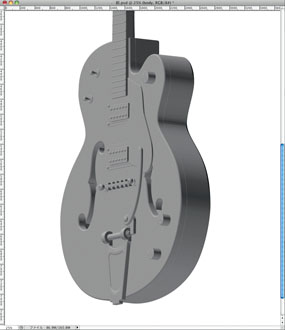
3Dオブジェクトの厚さを調整し、角を落とし、穴をあける。

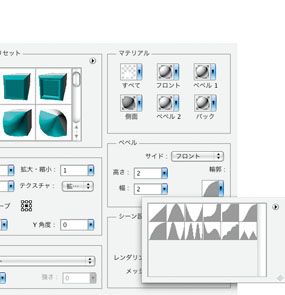 「押し出し」の深さを0.05に変更し、「ベベル」の高さと幅を2、「輪郭」はプリセットの中から円弧形状を選びオブジェクトの角を落とした。
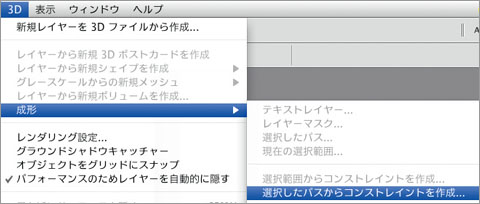
 新たにfホールのパスを引き、「3D」→「成形」→「選択したパス」から「コンストレイントを作成」を選ぶ。
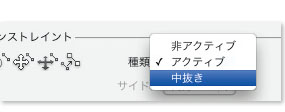 成形ウインドウ下部の「内部コンストレイント」の「種類」から「中抜き」を選ぶと、パスの形状で3Dオブジェクトがくり抜かれる。
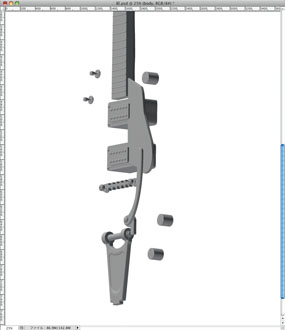
パーツとなる3Dオブジェクトを作り、組み上げてゆく
「押し出し」や「中抜き」を組み合わせるだけでも、さまざまな3Dオブジェクトを作ることができるが、対称的な形も断面図を描いて、簡単に成形することができる。
成形した複数の3Dオブジェクトは、それぞれ個別のレイヤーになっていて、統合することで同一空間内に置くことができる。3Dレイヤーは統合した後でも3Dオブジェクトを個別に動かしたり、成形の数値を変更したりすることが可能なので、ある程度パーツが揃ったらどんどん統合してゆくとよい。統合することでカメラアングルやライティングなどの変更が1度で済むので、別アングルでの確認、各オブジェクトのサイズや位置などのバランス調整が容易に行なえるようになる。
断面図から回転体を作成する
 断面図をパスなどで描き、それを回転させることで3Dオブジェクトを作ることもできる。
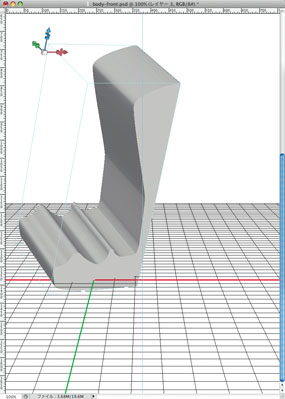 デフォルトでは上図のように押し出された形だが、プリセットの選択を変えると、回転体となる。
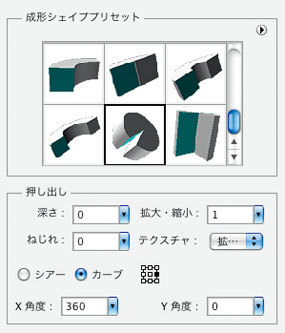 「成形シェイププリセット」から「カーブ5」を選択。デフォルトでは回転体が閉じきらないので「押し出し」の「X角度」を360に変更する。
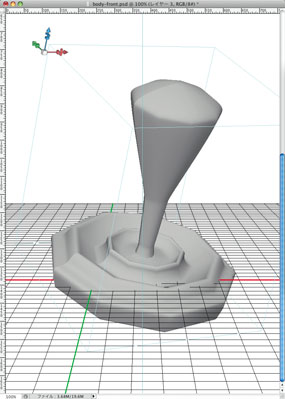 断面図を360°回転させて、上画面のような3Dオブジェクトが成形されたが、よく見てみると面やエッジが角張っている。
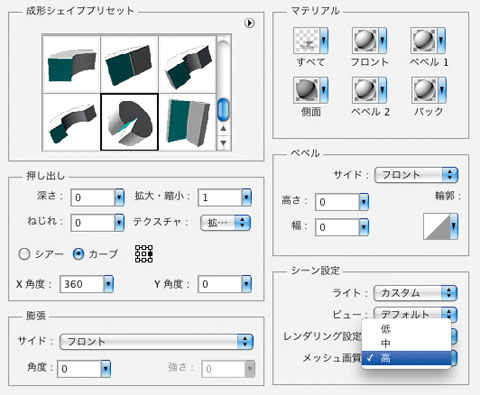
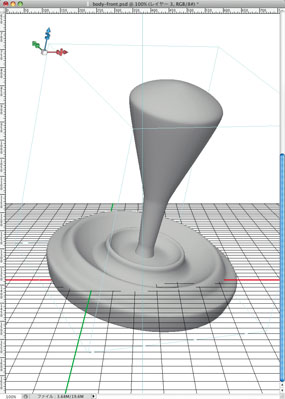 「シーン設定」の「メッシュ画質」を高くすると右画面のように滑らかな形状になる。
3Dオブジェクトと実写の合成もPhotoshop内で完結
一般的な3D作成ソフトでは背景をテンプレートとして読み込み、3Dオブジェクトのアングルやライティングを決めた後、レンダリングした画像をPhotoshopに持っていき合成作業を進める。
Photoshopで3Dオブジェクトを扱う場合は背景の画像の色調整を行ないながら、3Dオブジェクトのアングルを調整したり、3Dオブジェクトの作業と背景の2D作業を同時に進行するような感覚で進められる。
レンダリングに関しては、作業中は「ドラフト」で進めておき、最後にレイトレーシングでレンダリングすれば良いだろう。ちなみにレンダリングを中止する場合は、画面上をクリックすることで止めることができる。
背景画像に合わせて3Dオブジェクトのアングルとライティングを調整
 背景に使用した画像。
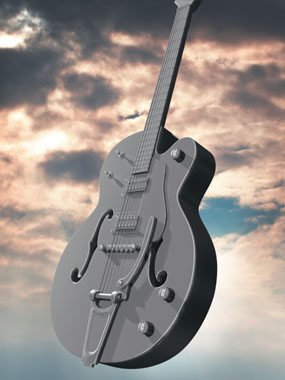 背景画像にモデリングした3Dオブジェクトを合成してアングルハンティングしてみる。
 色調補正は調整レイヤーなどを用いて通常のレタッチをする手順で行なっている。

オブジェクトに直接ペイント/表面のディテールを作成する
− ペイント −
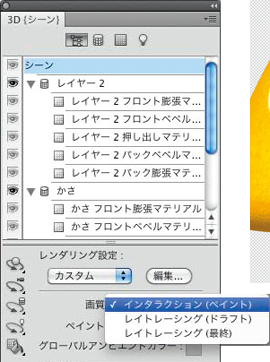
3Dパレットで画質をインタラクション(ペイント)に変更すると、3Dオブジェクトに直接ペイントすることが可能になる。より細かく書き加えたい場合は、テクスチャを開いて作業すればよい。

− ディテール −
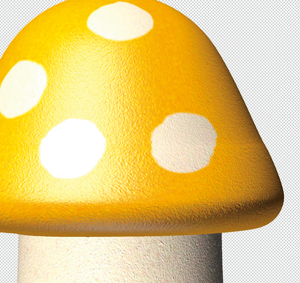
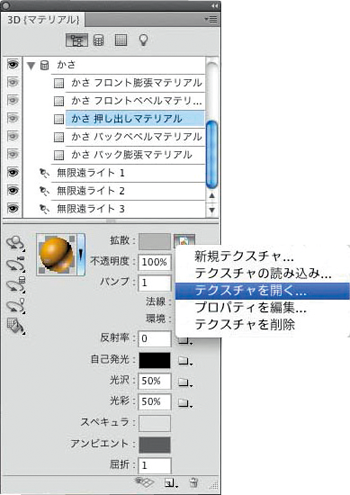
表面の細かな凹凸のディテールはバンプで表現している。
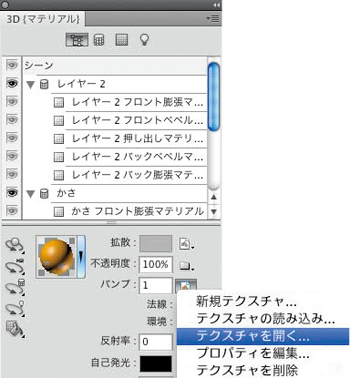
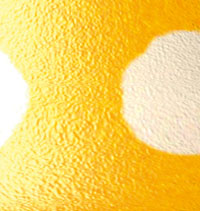
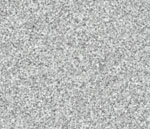
左画面を選ぶと別ウィンドウが開くので、白く塗りつぶしたレイヤーにノイズを入れて保存すると上図のような凹凸がオブジェクト表面に反映される。
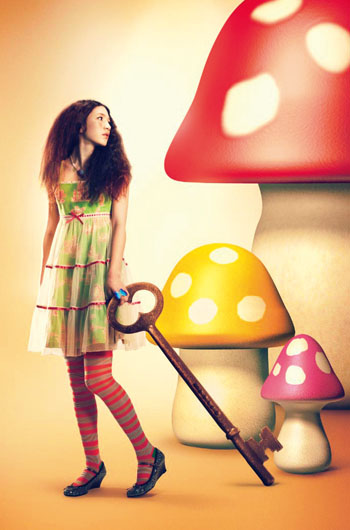
Photoshopの3D機能で作成したキノコと人物を合成。

基礎テクニック+Nik Collectionで魅力度アップ!Lightroom カラー作品を仕上げるRAW現像テクニック
桐生彩希 著
紙版1,800円+税(電子書籍版1,700円+税)
Lightroom CC/6で写真編集力アップ!作品づくりが上達するRAW現像読本
澤村 徹 著
紙版1,800円+税(電子書籍版1,600円+税)
最新機能をプロの視点で徹底検証Adobe Photoshop CC ハンドブック
PDF版を無償公開中
自動編集機能のガイドブックAdobe Photoshop オート機能完全攻略 CS6/CS5/CS4対応版
竹澤宏 著/玄光社 刊
紙版2,200円+税(電子書籍版1,800円+税)
大里宗也 Souya Ohsato
熊本工業大学附属情報技術専門学校メディアデザイン学科卒。2000年より株式会社VONSpictures所属。チーフCGデザイナー。http://www.vons.co.jp

- 第16回 水面への映り込みを作った後に波紋に合わせて画像に揺らぎを作る
- 第15回 3DCGソフトの機能を活用し撮影不可能なシーンを創る
- 第14回 3DCGの背景にモデルを合成する
- 第13回 マスクとトーンカーブで光と影をコントロールする
- 第12回 高度なプラグインソフトを活用する
- 第11回 透明な液体のレタッチ
- 第10回 モノクロームの処理 応用編
- 第9回 モノクロームの処理基礎篇
- 第8回 製品イメージカットの演出
- 第7回 フードフォトのレタッチ
- 第6回 Photoshop CS5 Extendedの進化した3D機能を使いこなす
- 第5回 Photoshop CS5の新ペイントツール「混合ブラシ」で写真を絵画調に加工
- 第4回 Photoshop CS5の新機能「パペットワープ」で素材の形を操る
- 「Adobe Photoshopで実践する フォトレタッチ講座」発売
- 第3回 肌の処理
- 第2回 合成の馴染ませ方
- 第1回 「マスクを作る」