TAG
TAG- コピースタンプツール , スポット修復ブラシツール , パッチツール , 修復ブラシツール
2016年10月27日
風景写真を撮る時に気になるのが、通行人や電線などの障害物。どうしてもこれらの写り込みを防げない場合には、撮影後のレタッチ処理で仕上げていくことになる。コピースタンプツールや修復ブラシなど、Photoshopに装備された消去系ツールの特徴を知って、違和感なく消す方法を身につけよう。
ネイチャーシーンにおいて、ゴミや通行人、電線などの障害物はできれば排除したい。手の届く範囲のゴミなら撮影時に取り除くことができるが、実際はそうでない場合が多いのが悩みどころだ。
このような場合、撮影後にPhotoshopで消去することになるのだが、状況によっては消し跡が目立ってしまうこともあるだろう。
これはPhotoshopが悪いのではなく、使い方の問題だ。写真上の「ものを消す」仕組みを理解して、「適切な機能」を選び、「効果的な消し方」を実践することで、不要なものがきれいに消せるようになる。
そこで今回は、邪魔なものを消すテクニックやアイデアを紹介していこう。
テーマ:障害物の消し方を覚える


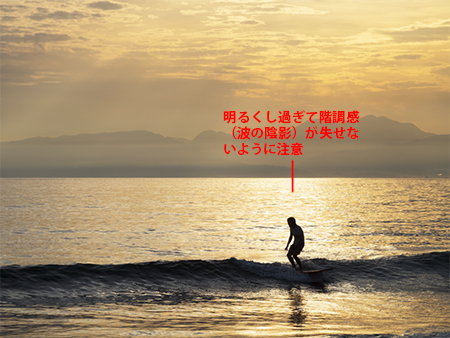
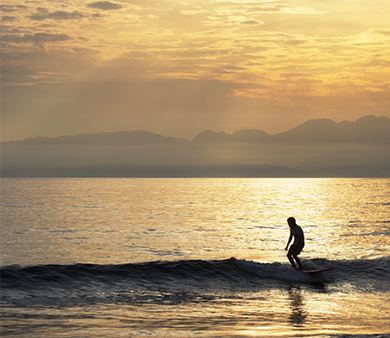
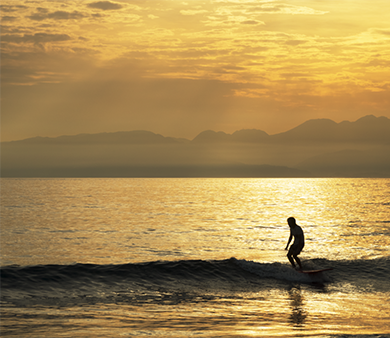
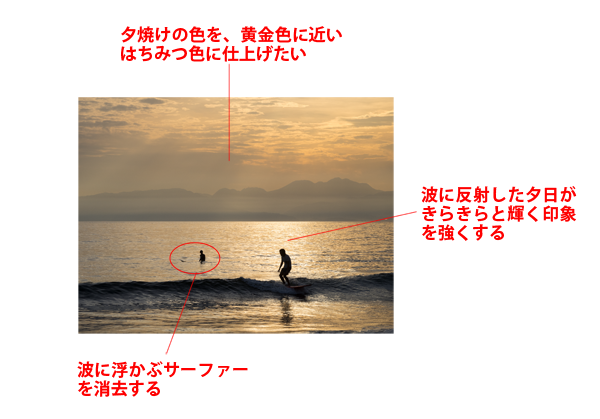
オリンパスOM-D E-M1 OLYMPUS M.ZUIKO DIGITAL ED 75-300mm F4.8-6.7 II 絞り優先AE(f10 1/800秒) 補正なし ISO200 324分割デジタルESP測光 WB:オート
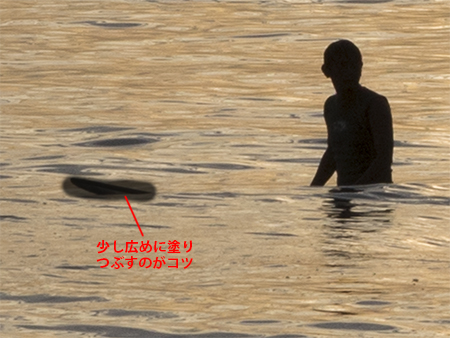
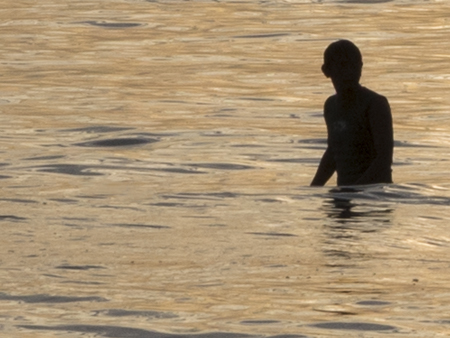
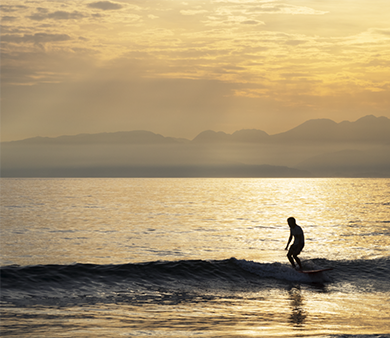
やわらかな夕日+霞んだ遠景+波は、個人的に好きなシーンのひとつ。作例は、一日の終わりをまったりとした雰囲気で表現するため、ゆるい姿勢のサーファーをシルエット状で写し込んだカットだ。しかし、撮影時に奥に浮かぶサーファーを省くことができなかったので、これをPhotoshopで消去し、さらに夕焼けの色もイメージに合わせて調整したい。
>>作例写真のダウンロードはこちらから
※作例写真を使ってPhotoshopの操作が学べます。画像の利用目的は個人利用に限ります。
「邪魔者を消す=別の画像を重ねる」ということ
類似した作業を「障害物を消去して色を整える」で行なっているが、これは消しやすいケース。状況によっては、消した跡が周囲となじまず、違和感が生じることもある。
写真上の障害物が消える原理は、消したいものの上から「ほかの画像を重ねて目立たなく」しているに過ぎない。つまり、穴の開いた服にパッチを充てて修繕するようなものだ。
まずはこの点を理解し、邪魔なものを消すには「どの部分の画像を重ねればよいか」を考え、重ねるための「ツールの選択」や、重ねた「跡をなじませる処理」を施すことが重要になる。
はじめに
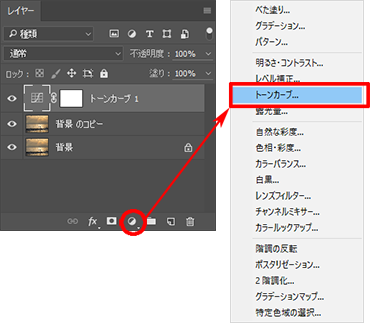
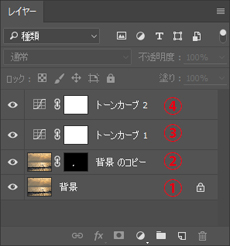 最終的なレイヤーの状態
①の「背景」は元の状態を維持したレイヤー。背景を複製したレイヤー(②)に対して、消去の処理を適用。
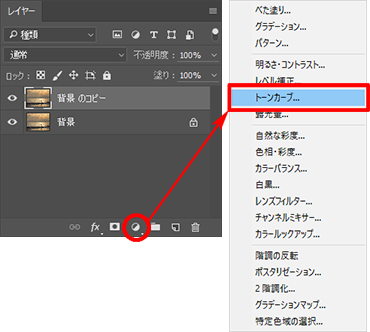
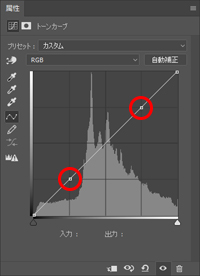
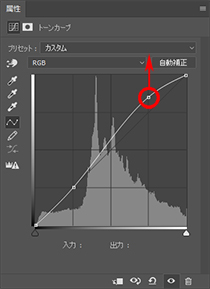
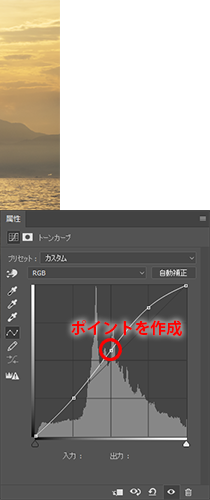
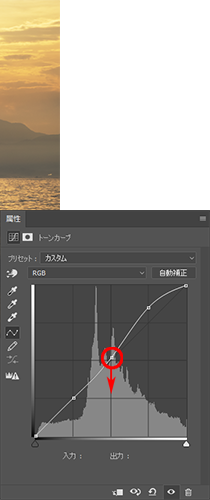
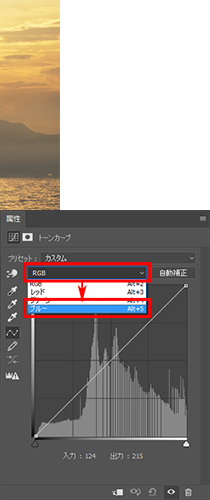
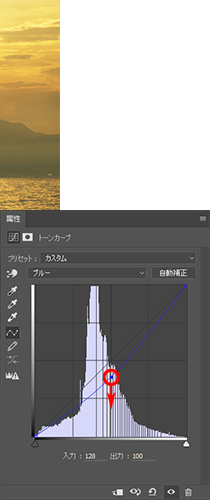
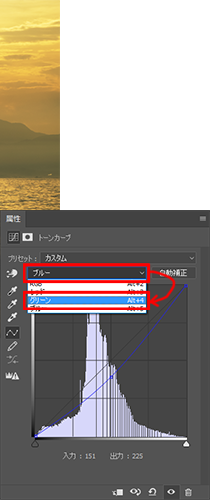
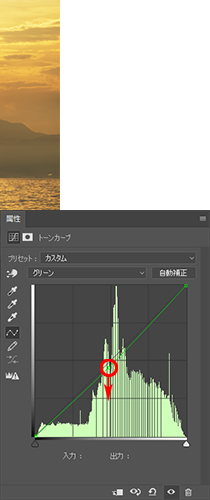
③はコントラスト調整の「トーンカーブ」で、④は色調整の「トーンカーブ」になっている。「トーンカーブ」の補正は、あえて明暗と色を分けて再調整がしやすいレイヤー構成にしている。
①ものが消える仕組みを理解しよう
■STEP1 「消す」ではなく「隠す」と考える
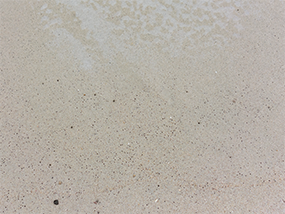
写真上の障害物は、厳密にいうと消すことはできない。消えたように見えるだけで、実際は別の画像を重ねて隠しているだけのこと。砂の上のゴミなら砂の画像を、芝生の上のゴミなら芝生の画像を重ねれば、不要なものが消えて見えるという理屈だ。これがレタッチでものが消える仕組みで、Photoshopにはそのための機能がたくさん用意されている。
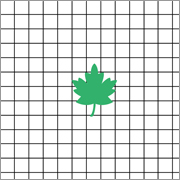
 元の画像
元の画像
 消えたように見える
■STEP2 上手く消すためのアイデア
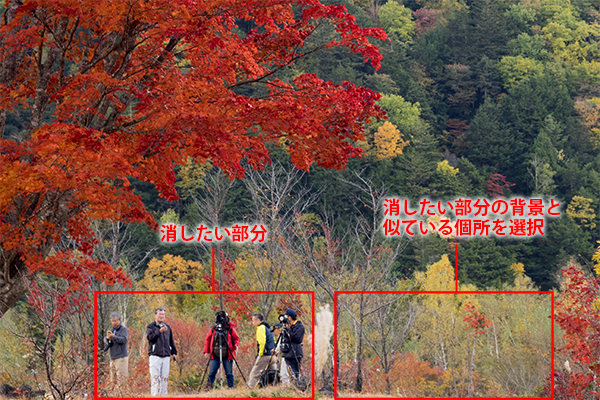
違和感なくものを消すために考えることは、背後の景色と似た部分を探すということ。その部分を選択したら、コピー&ペーストで消したい画像の上に重ねれば、ひとまずは消えたように見える。あとは、「消しゴムツール」や「レイヤーマスク」などで、重ねた画像のエッジを消去して柔らかくぼかせばOK。この作業を簡単に行なってくれる機能が、後述の「コピースタンプツール」や「パッチツール」「修復ブラシツール」などだ。
 元の画像
元の画像
![]()
 コピー&ペーストで画像を重ねる
![]()
 エッジをぼかしてなじませると違和感のない仕上がりになる
■STEP3 消しやすいシーンと消しにくいシーン
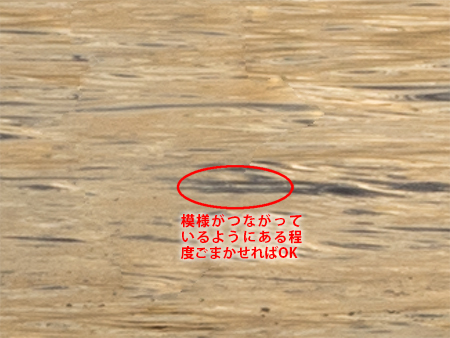
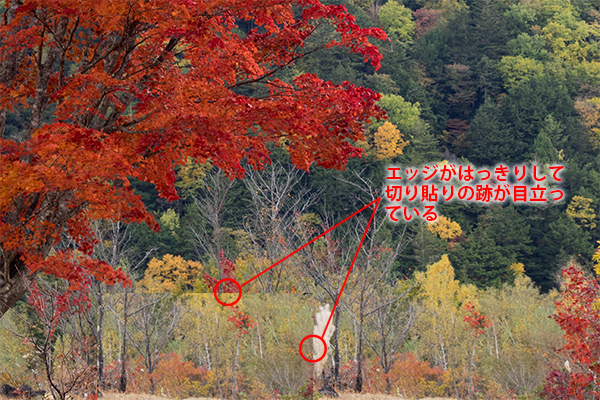
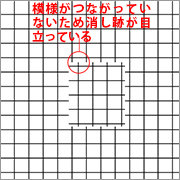
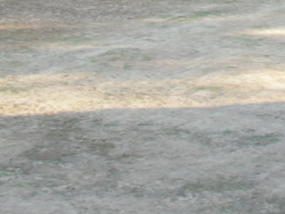
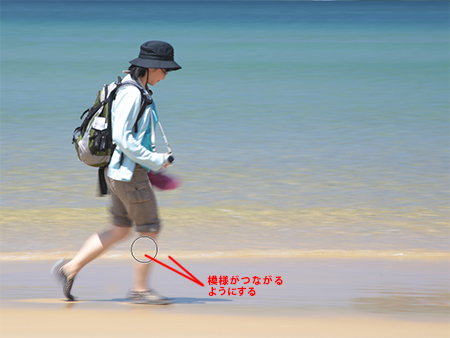
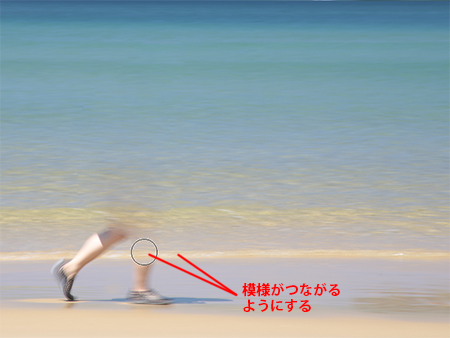
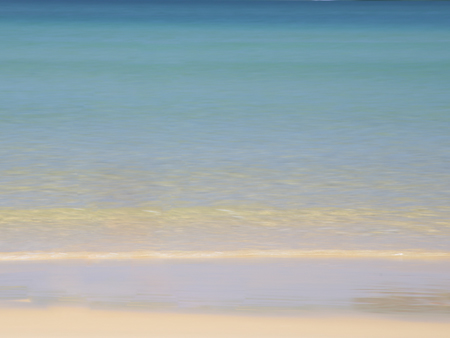
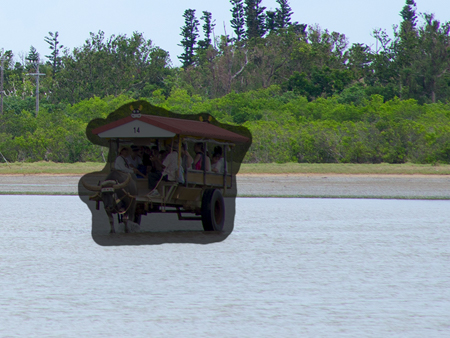
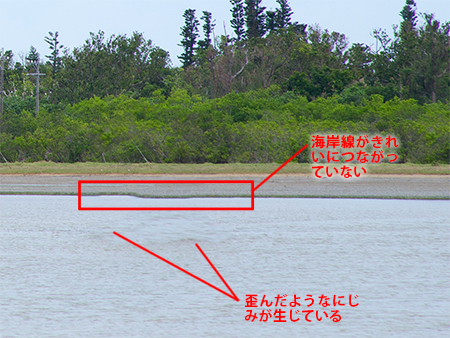
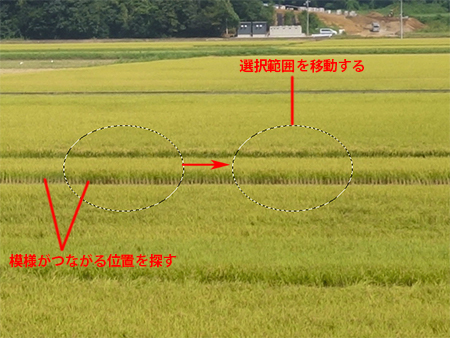
STEP1やSTEP2のように、背景が細かくてランダムな模様の場合、レタッチである程度きれいに消すことができる。しかし、特徴的なラインで構成された背景(波や木の枝など)や、微妙なグラデーションの背景(空など)の場合、消し跡が目立つことがある。前者なら、「背景と模様がつながる」ように画像を上描きすればよいのだが、後者の場合は消したい範囲が広いときれいに消せないことも。どうしても消し跡が目立つときは、諦めるという選択肢も考慮しておきたい。
 元の画像
元の画像
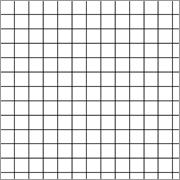
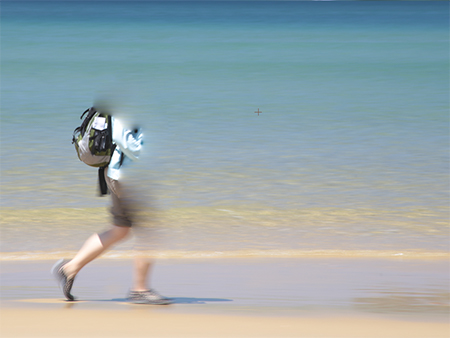
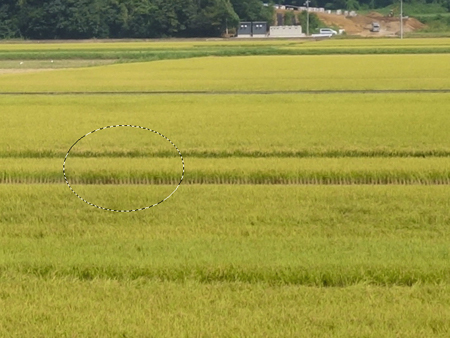
 背景と似た部分をコピー&ペーストで重ねた状態
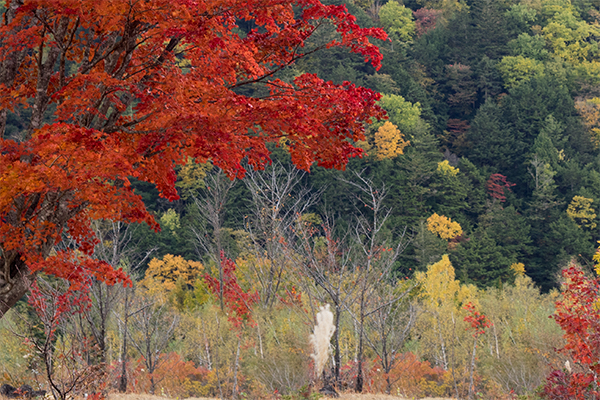
 模様がつながるように画像を重ねると違和感なく消すことができる。ネイチャーシーンでは、この考え方が重要になることが多い
②消去系機能の種類と特徴
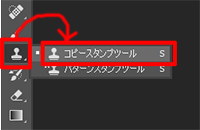
■STEP1 コピースタンプツール
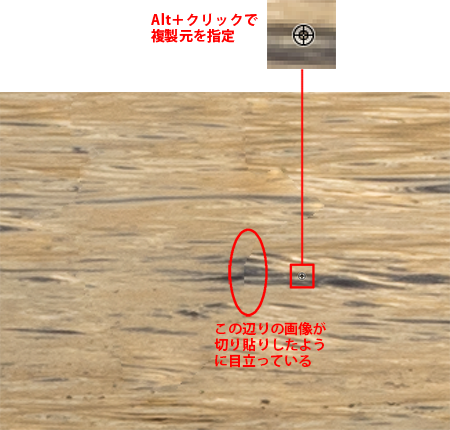
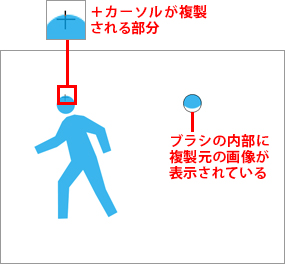
Photoshopにおいて、消去するための基本的な機能が、ツールパネルに搭載されている「コピースタンプツール」。本来は指定した画像をトレースして複製する機能だが、消したい部分の背景と似た部分を複製することで消去機能として活用できる。ただし、まったく同じ画像が複製されるため、繰り返される模様が目立たない、かつ、背景の連続した模様が途切れないようにする点が使いこなすポイントだ。
「コピースタンプツール」の仕組み
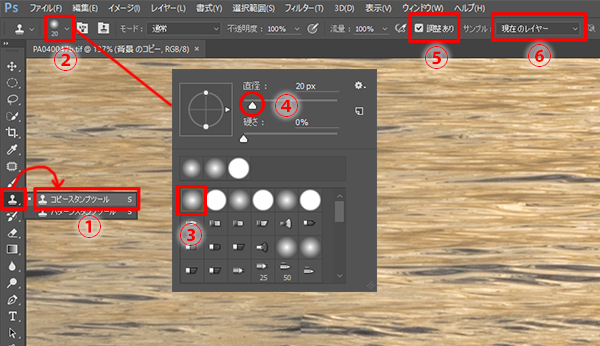
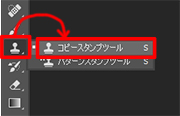 ツールパネルで
「コピースタンプツール」を選択する
 キーボードのAltキー(MacはOptionキー)を押しながら、複製する元の画像をクリック
 画像を複製したい部分でドラッグを開始
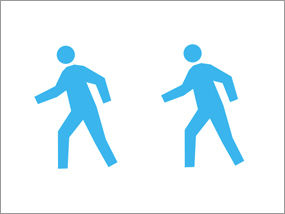
ドラッグして塗りつぶしていくと、
コピー元と同じ画像が描画できる
「コピースタンプツール」で消去する(NGの例)
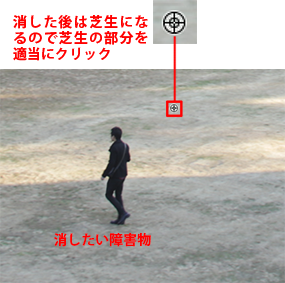 消したい障害物の背景と同じような部分を、キーボードのAltキー(MacはOptionキー)を押しながらクリック
 ドラッグして芝生の画像を上描きして消去
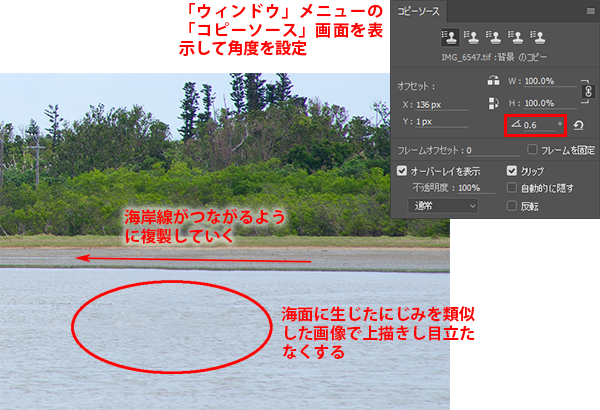
「コピースタンプツール」で上手に消去する
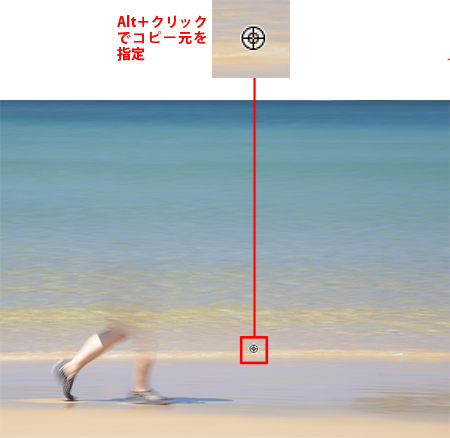
 消したい部分の背景と類似していて、さらに模様をつなげたい部分で、キーボードのAltキー(MacはOptionキー)を押しながらクリック
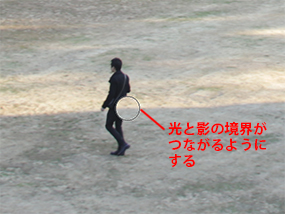 ブラシ内の模様と背景がつながる場所にブラシを移動して描画を開始
ブラシのボケ足や大きさを調整しながら不要な部分をドラッグして消していく
≪ワンポイント≫
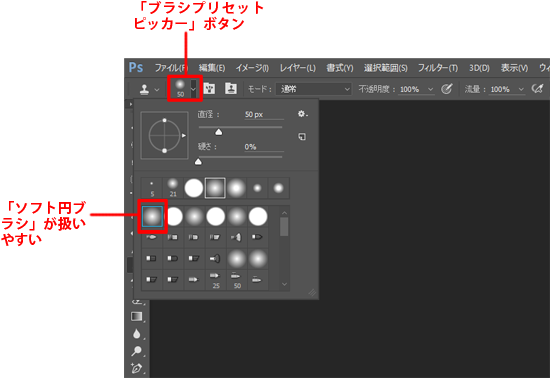
■ブラシの形状を編集する
「コピースタンプツール」のブラシの形状は、画面上部にある「ブラシプリセットピッカー」ボタンをクリックすると編集できる。また、画面上で右クリックしてもOK。ボケ足のある「ソフト円ブラシ」を選択すると、消し跡が目立たなくなる。
■STEP2 修復ブラシツール
「コピースタンプツール」よりも消去する効果が強化された機能が、ツールパネルにある「修復ブラシツール」。使い方は「コピースタンプツール」と同様だが、まったく同じ画像で上描きされるのではなく、背景の状態に応じて目立たなくなるようになじませる処理が施される点が異なっている。「コピースタンプツール」やその他の機能との使い分けは、STEP5を参照。
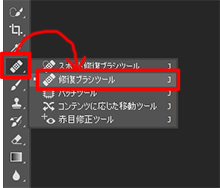 ツールパネルで
「修復ブラシツール」を選択する
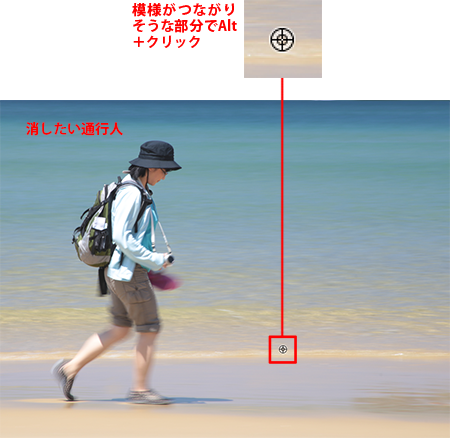
消したい部分の背景と類似していて、さらに模様をつなげたい部分で、キーボードのAltキー(MacはOptionキー)を押しながらクリック
ブラシ内の画像と背景が違和感なくつながる位置から描画を開始
ドラッグすると、背景の状態に応じて障害物が消えていく
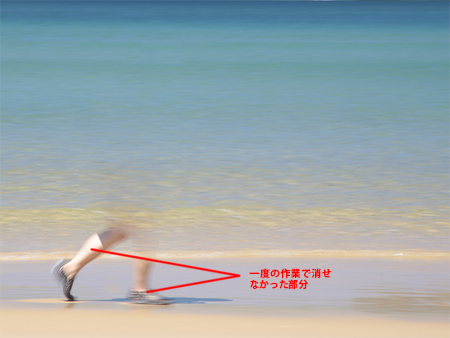
にじみがなくなるまでドラッグする範囲を広げる。一度の描画で消えないときは、適度に消えたところでいったん作業を中断
もう一度、消したい部分の模様がつながる位置でAltキーを押しながらクリック
ブラシ内の画像を参考に、背景の模様がつながる位置から描画を開始
同様の作業を何度か繰り返せば、シンプルな背景なら大きな障害物でも消去できる
■STEP3 スポット修復ブラシツール
STEP2の「修復ブラシツール」を自動化した機能が「スポット修復ブラシツール」。コピー元を指定せず、消したい部分をドラッグするだけで消去することが可能。撮像素子に付着したごみの陰は、この機能でクリックすればOK。描画をはじめる位置やブラシの大きさなどにより結果が異なるので、うまく消えないときは何度か繰り返してみるとよい。また、消し跡ににじみや不自然な描写が生じたときは、「コピースタンプツール」などで修整すると効果的だ。
 ツールパネルで
「スポット修復ブラシツール」を選択する
消したい部分をブラシでドラッグする。ブラシの大きさは、画面上部の「ブラシピッカー」ボタンか、右クリックで表示される「ブラシピッカー画面」で調整可能
ドラッグが完了すると、障害物を検出して自動的に消去される。消し跡ににじみなどがある場合、作業を取り消してブラシの大きさや塗りつぶし方を変えるか、別の機能で細部を仕上げていく
ツールパネルで
「コピースタンプツール」を選択する
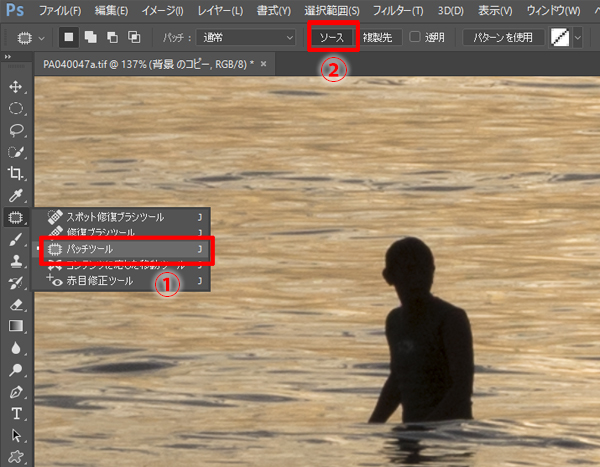
■STEP4 パッチツール
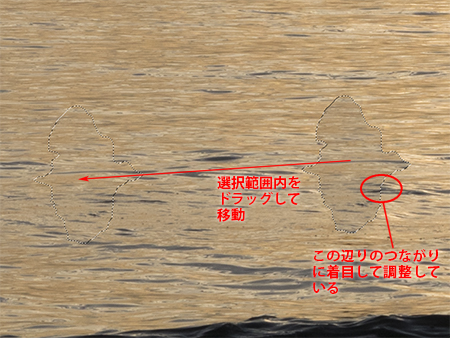
消したい部分を選択して、類似した部分に選択範囲を移動することで障害物を検出し、自動で消去する機能。ShiftキーやAltキー(MacはOptionキー)を押しながらドラッグすれば、選択範囲の追加や削除が行える。使いこなすコツは、「コピースタンプツール」のように模様がつながる部分を探すこと。多少色が異なっていても、Photoshopが自動的に色調を整えてくれる点も特徴のひとつだ。
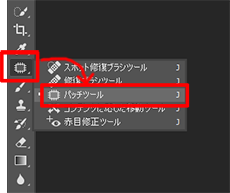 ツールパネルで
「パッチツール」を選択する
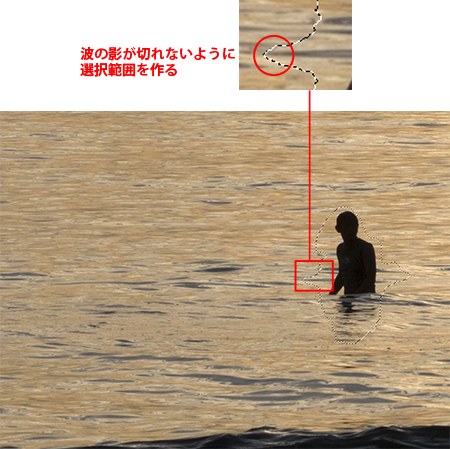
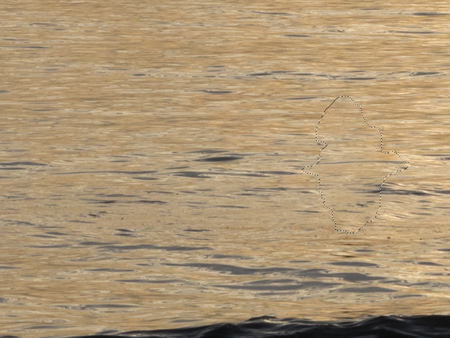
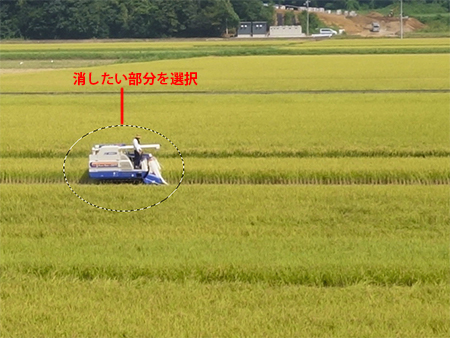 ドラッグして消したい障害物を選択する。選択範囲機能であらかじめ選択してから「パッチツール」を選んでもOK
 選択範囲をドラッグして移動すると、移動先の画像が元の選択範囲内に表示される。特徴的な模様などがあるときは、それらがつながるようにすると効果的
 マウスのボタンを離すと、障害物を検出して消去される
■STEP5 消去系ツールの使い分け
まずは全自動の「スポット修復ブラシツール」で消去してみて、消し跡がにじんだり、不自然な仕上がりになるようなら半自動の「修復ブラシツール」を使ってみよう。それでもうまく消えないときは、「コピースタンプツール」で少しずつ消していくとよいだろう。広い範囲を消したいときは「パッチツール」を使うと効率よく作業できる。「パッチツール」と「修復ブラシツール」はほぼ同じ効果が得られるので、使いやすいほうで作業すればよい。
③写り込んだ障害物を消去する
■STEP1 「背景」レイヤーを複製する
「レイヤー」パネルの「背景」のレイヤーを、パネル下部にある ![]() ボタンにドラッグ&ドロップして複製を作成。以降の消去する作業は、複製したレイヤーに対して行う。消去の作業に失敗したら、レイヤーを削除して、再度「背景」のレイヤーを複製すればOKだ。
ボタンにドラッグ&ドロップして複製を作成。以降の消去する作業は、複製したレイヤーに対して行う。消去の作業に失敗したら、レイヤーを削除して、再度「背景」のレイヤーを複製すればOKだ。
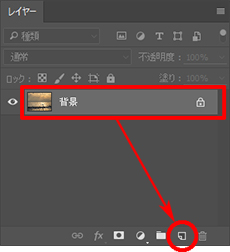 「背景」のレイヤーを
 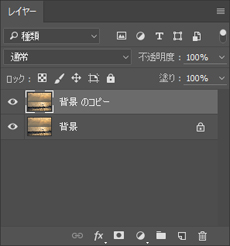 「背景のコピー」レイヤーが作られたら、選択した状態にしておく
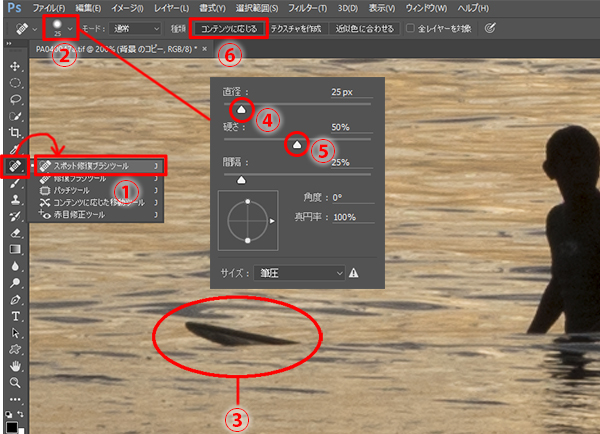
■STEP2 「スポット修復ブラシツール」を設定する
消去系の機能は、作業が簡単な「スポット修復ブラシツール」から試すと効率がよい。①ツールパネルで「スポット修復ブラシツール」を選択したら、②「ブラシプリセットピッカー」ボタンをクリック。③消したい部分が塗りつぶしやすい大きさのブラシに設定したら(④)、⑤「硬さ」を「50%」に設定。「硬さ」はブラシのボケ足で、設定値が小さいほどボケ足のあるブラシになる。消し跡がぼやけて目立つときは、「硬さ」の設定を大きくしてやり直してみよう。⑥「種類」を「コンテンツに応じる」に設定したら準備は完了。
 「スポット修復ブラシツール」を設定する
≪ワンポイント≫
■「コンテンツに応じる」とは
背景の状態に応じて描画する画像を調整する機能。選択すると画像を解析して、不要な部分だけが重点的に消去できるようになる。